Sale Price:
$99.00
Original Price:
$135.00
Create beautiful pink & white ombré nails with ease. This beginner-friendly bundle includes six essential acrylic powders perfect for baby boomer, French, nude, and classic pink & white nail designs.
Includes (1 oz each):
💖 Lite Nude
💖 Base Nude
💖 Beige
🤍 Milky White
🤍 Pure White
✨ Crystal Clear
Choose Your 100% Kolinsky Acrylic Brush: #10, #12, or #14
✨ 2-in-1 formula for acrylic and dipping applications
✨ Easy-to-work-with consistency
✨ Smooth blending for flawless ombré effects
✨ Perfect for beginners, students, and professionals alike
💅 Acrylic Powder Application Guide (Beginner Friendly)
Acrylic application becomes easy when you focus on prep, bead control, and proper structure — not speed.
✨ Step 1: Proper Nail Prep (MOST IMPORTANT)
✅ Sanitize hands
✅ Push back cuticles gently
✅ Remove shine from natural nail using 180–240 grit buffer
✅ Clean dust thoroughly
✅ Apply nail dehydrator
✅ Apply primer (avoid skin contact)
👉 Proper prep prevents lifting.
✨ Step 2: Apply Nail Form or Tip
✨ Step 3: Acrylic Bead Ratio
Dip brush into monomer → wipe excess → pick up powder.
✔ Bead should look smooth & slightly glossy
✔ Not runny
✔ Not dry or crumbly
💡 Beginner Tip:
Think “buttery consistency.”
✨ Step 4: Apply 3-Bead Method (Recommended for Beginners)
1️⃣ Cuticle Bead
2️⃣ Apex Bead
Medium bead placed in stress area.
Build structure and strength.
This is the highest point of the nail.
3️⃣ Free Edge Bead
Apply bead toward tip.
Smooth and refine shape.
👉 Let acrylic self-level — avoid over-brushing.
✨ Step 5: Shape & Refine
Once acrylic fully hardens:
✅ File sidewalls straight
✅ Refine apex
✅ Smooth surface
✅ Perfect nail shape
Use:
✨ Step 6: Finish
⭐ Beginner Pro Tips
✔ Work with small beads first
✔ Control liquid ratio — not speed
✔ Always build apex for durability
✔ Keep brush clean while working
✔ Practice placement before filing
🚫 Common Beginner Mistakes
❌ Flooding cuticles
❌ Beads too wet or too dry
❌ Flat nails (no apex)
❌ Over-filing natural nail
❌ Touching skin with acrylic
💅 One Bead Acrylic Application
(Cuticle → Free Edge Method)
This technique uses one controlled acrylic bead placed near the cuticle area, then smoothly guided down toward the free edge to create a seamless, structured nail.
Perfect for beginners learning product control and smooth blending.
✨ Step 1: Nail Preparation
✅ Sanitize hands
✅ Push back and clean cuticle area
✅ Remove natural nail shine (180–240 grit)
✅ Remove dust thoroughly
✅ Apply dehydrator
✅ Apply primer
👉 Proper prep prevents lifting.
✨ Step 2: Apply Tip or Nail Form
✨ Step 3: Pick Up One Acrylic Bead
Dip brush into monomer → wipe excess → pick up powder.
✔ Medium-large bead
✔ Smooth & glossy surface
✔ Soft buttery consistency
💡 The bead should move — not run.
✨ Step 4: Bead Placement (KEY STEP)
Place one bead slightly below the cuticle area
(about 1–2 mm away from skin).
⚠️ Never place directly into the cuticle.
Allow bead to settle for 1–2 seconds.
✨ Step 5: Control From Cuticle to Free Edge
1️⃣ Blend Toward Cuticle
Use brush tip to gently press product upward.
Feather lightly for a seamless blend.
Keep product thin near cuticle.
2️⃣ Build Apex
3️⃣ Pull Toward Free Edge
👉 Press + glide motion
👉 Minimal brushing = smoother finish
✨ Step 6: Self-Level & Set
Allow acrylic to level itself.
Avoid overworking the product.
You should already see:
✅ Smooth surface
✅ Natural apex
✅ Even thickness
✨ Step 7: File & Refine
Once fully hardened:
✅ Straight sidewalls
✅ Refined apex
✅ Smooth surface
✅ Final nail shape
⭐ Pro Tips
✔ Slightly wetter bead helps full coverage
✔ Keep brush clean at all times
✔ Angle brush flat when pulling product
✔ Gravity helps product flow downward
🚫 Common Beginner Mistakes
❌ Flooding cuticle
❌ Bead too dry to move
❌ Over-brushing acrylic
❌ Flat nail (missing apex)
❌ Thick free edge
💎 Pro Educator Secret:
When done correctly, the cuticle-to-free-edge one bead method creates a nearly finished nail — meaning less filing, faster sets, and salon-quality structure.
Create beautiful pink & white ombré nails with ease. This beginner-friendly bundle includes six essential acrylic powders perfect for baby boomer, French, nude, and classic pink & white nail designs.
Includes (1 oz each):
💖 Lite Nude
💖 Base Nude
💖 Beige
🤍 Milky White
🤍 Pure White
✨ Crystal Clear
Choose Your 100% Kolinsky Acrylic Brush: #10, #12, or #14
✨ 2-in-1 formula for acrylic and dipping applications
✨ Easy-to-work-with consistency
✨ Smooth blending for flawless ombré effects
✨ Perfect for beginners, students, and professionals alike
💅 Acrylic Powder Application Guide (Beginner Friendly)
Acrylic application becomes easy when you focus on prep, bead control, and proper structure — not speed.
✨ Step 1: Proper Nail Prep (MOST IMPORTANT)
✅ Sanitize hands
✅ Push back cuticles gently
✅ Remove shine from natural nail using 180–240 grit buffer
✅ Clean dust thoroughly
✅ Apply nail dehydrator
✅ Apply primer (avoid skin contact)
👉 Proper prep prevents lifting.
✨ Step 2: Apply Nail Form or Tip
✨ Step 3: Acrylic Bead Ratio
Dip brush into monomer → wipe excess → pick up powder.
✔ Bead should look smooth & slightly glossy
✔ Not runny
✔ Not dry or crumbly
💡 Beginner Tip:
Think “buttery consistency.”
✨ Step 4: Apply 3-Bead Method (Recommended for Beginners)
1️⃣ Cuticle Bead
2️⃣ Apex Bead
Medium bead placed in stress area.
Build structure and strength.
This is the highest point of the nail.
3️⃣ Free Edge Bead
Apply bead toward tip.
Smooth and refine shape.
👉 Let acrylic self-level — avoid over-brushing.
✨ Step 5: Shape & Refine
Once acrylic fully hardens:
✅ File sidewalls straight
✅ Refine apex
✅ Smooth surface
✅ Perfect nail shape
Use:
✨ Step 6: Finish
⭐ Beginner Pro Tips
✔ Work with small beads first
✔ Control liquid ratio — not speed
✔ Always build apex for durability
✔ Keep brush clean while working
✔ Practice placement before filing
🚫 Common Beginner Mistakes
❌ Flooding cuticles
❌ Beads too wet or too dry
❌ Flat nails (no apex)
❌ Over-filing natural nail
❌ Touching skin with acrylic
💅 One Bead Acrylic Application
(Cuticle → Free Edge Method)
This technique uses one controlled acrylic bead placed near the cuticle area, then smoothly guided down toward the free edge to create a seamless, structured nail.
Perfect for beginners learning product control and smooth blending.
✨ Step 1: Nail Preparation
✅ Sanitize hands
✅ Push back and clean cuticle area
✅ Remove natural nail shine (180–240 grit)
✅ Remove dust thoroughly
✅ Apply dehydrator
✅ Apply primer
👉 Proper prep prevents lifting.
✨ Step 2: Apply Tip or Nail Form
✨ Step 3: Pick Up One Acrylic Bead
Dip brush into monomer → wipe excess → pick up powder.
✔ Medium-large bead
✔ Smooth & glossy surface
✔ Soft buttery consistency
💡 The bead should move — not run.
✨ Step 4: Bead Placement (KEY STEP)
Place one bead slightly below the cuticle area
(about 1–2 mm away from skin).
⚠️ Never place directly into the cuticle.
Allow bead to settle for 1–2 seconds.
✨ Step 5: Control From Cuticle to Free Edge
1️⃣ Blend Toward Cuticle
Use brush tip to gently press product upward.
Feather lightly for a seamless blend.
Keep product thin near cuticle.
2️⃣ Build Apex
3️⃣ Pull Toward Free Edge
👉 Press + glide motion
👉 Minimal brushing = smoother finish
✨ Step 6: Self-Level & Set
Allow acrylic to level itself.
Avoid overworking the product.
You should already see:
✅ Smooth surface
✅ Natural apex
✅ Even thickness
✨ Step 7: File & Refine
Once fully hardened:
✅ Straight sidewalls
✅ Refined apex
✅ Smooth surface
✅ Final nail shape
⭐ Pro Tips
✔ Slightly wetter bead helps full coverage
✔ Keep brush clean at all times
✔ Angle brush flat when pulling product
✔ Gravity helps product flow downward
🚫 Common Beginner Mistakes
❌ Flooding cuticle
❌ Bead too dry to move
❌ Over-brushing acrylic
❌ Flat nail (missing apex)
❌ Thick free edge
💎 Pro Educator Secret:
When done correctly, the cuticle-to-free-edge one bead method creates a nearly finished nail — meaning less filing, faster sets, and salon-quality structure.

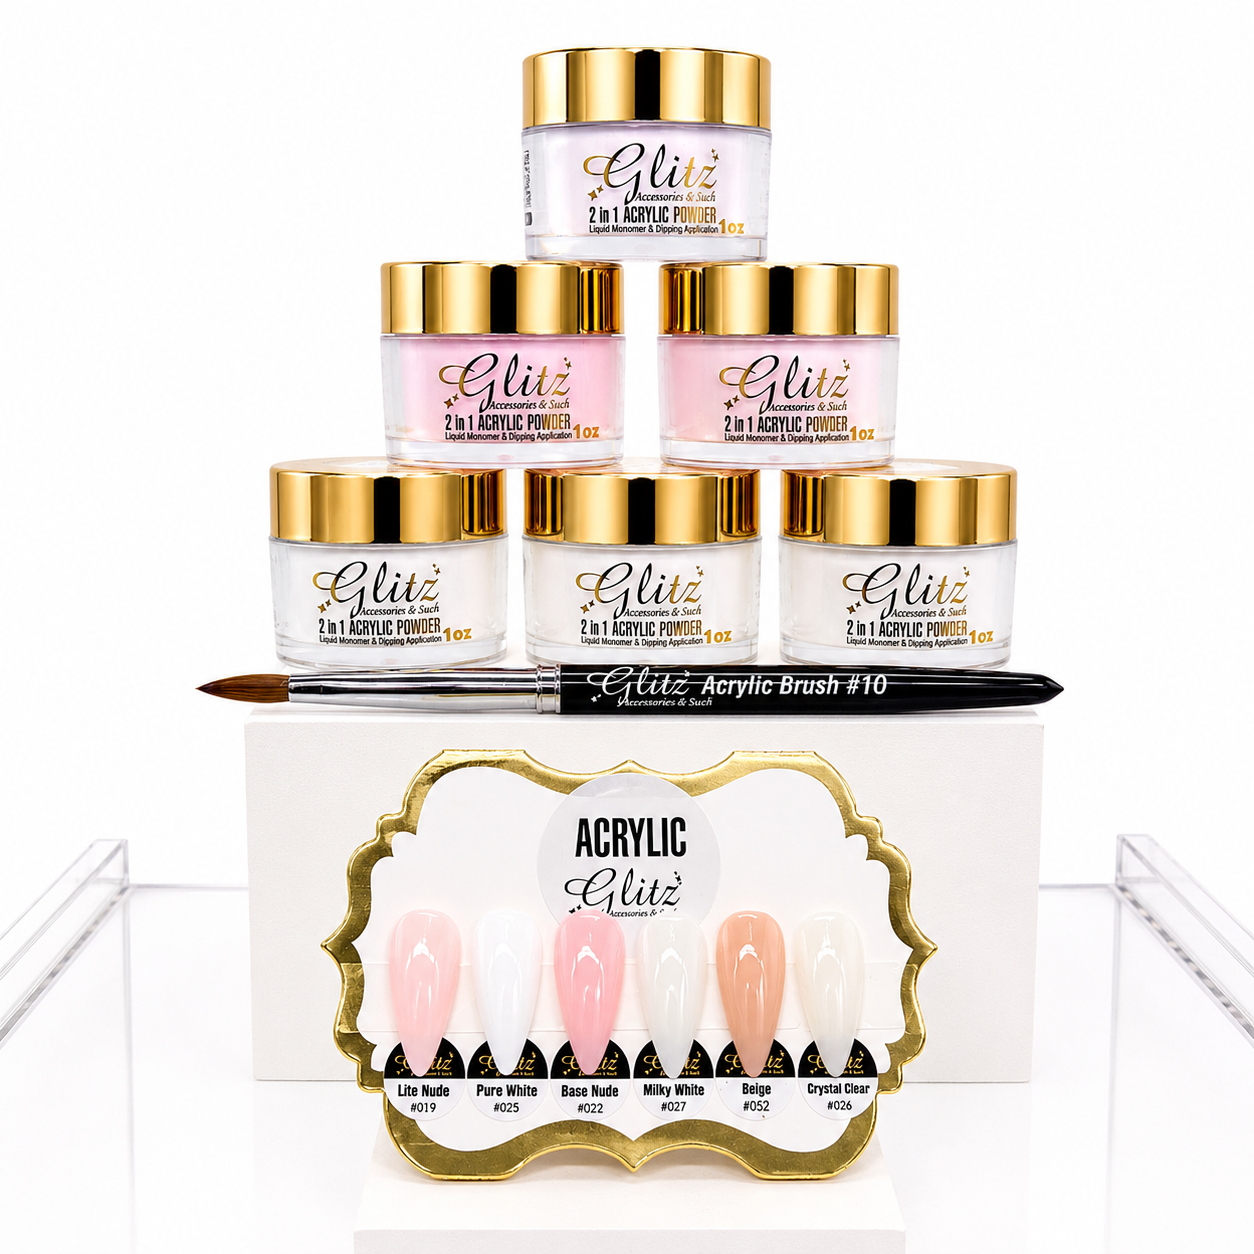 Image 1 of 7
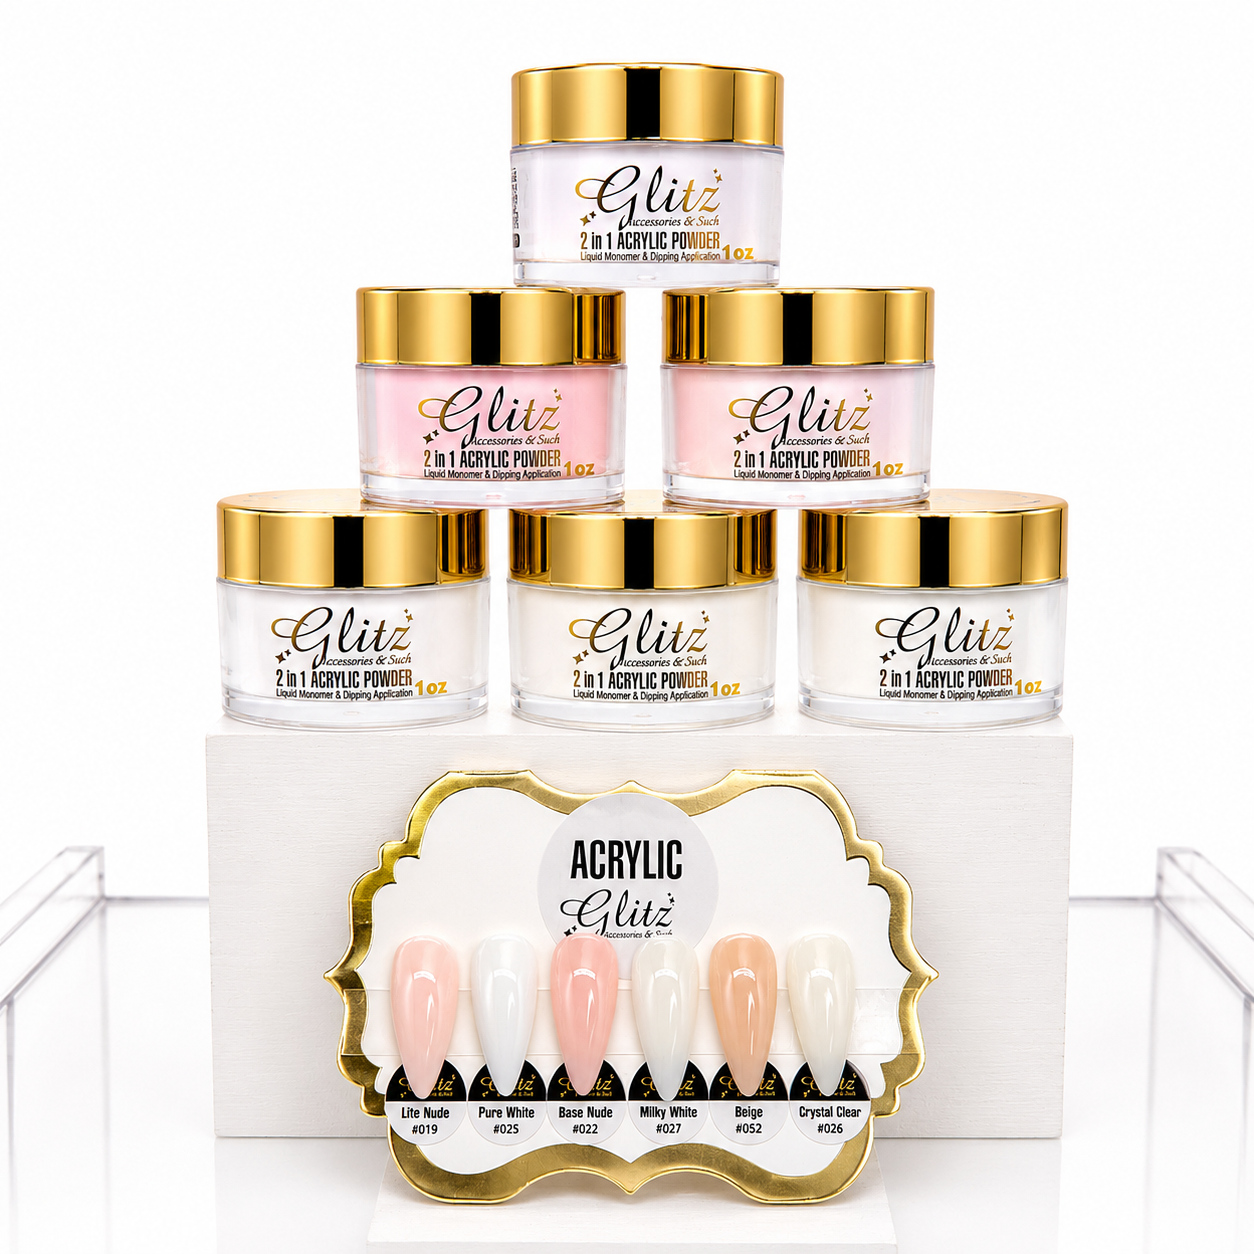 Image 2 of 7
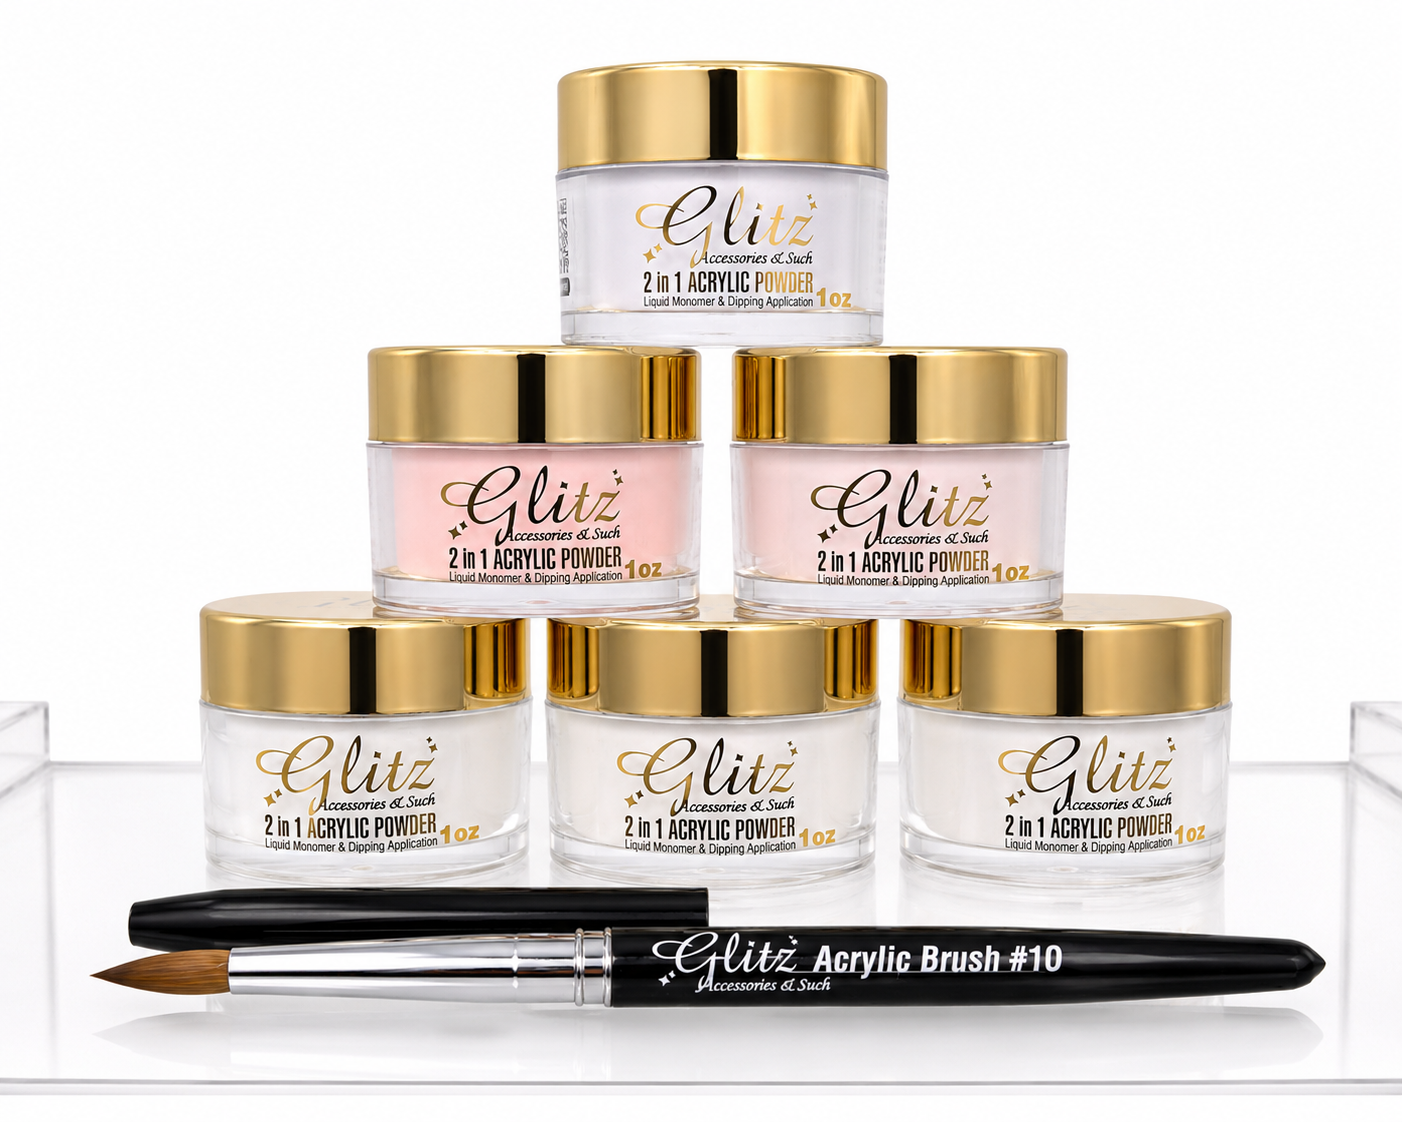 Image 3 of 7
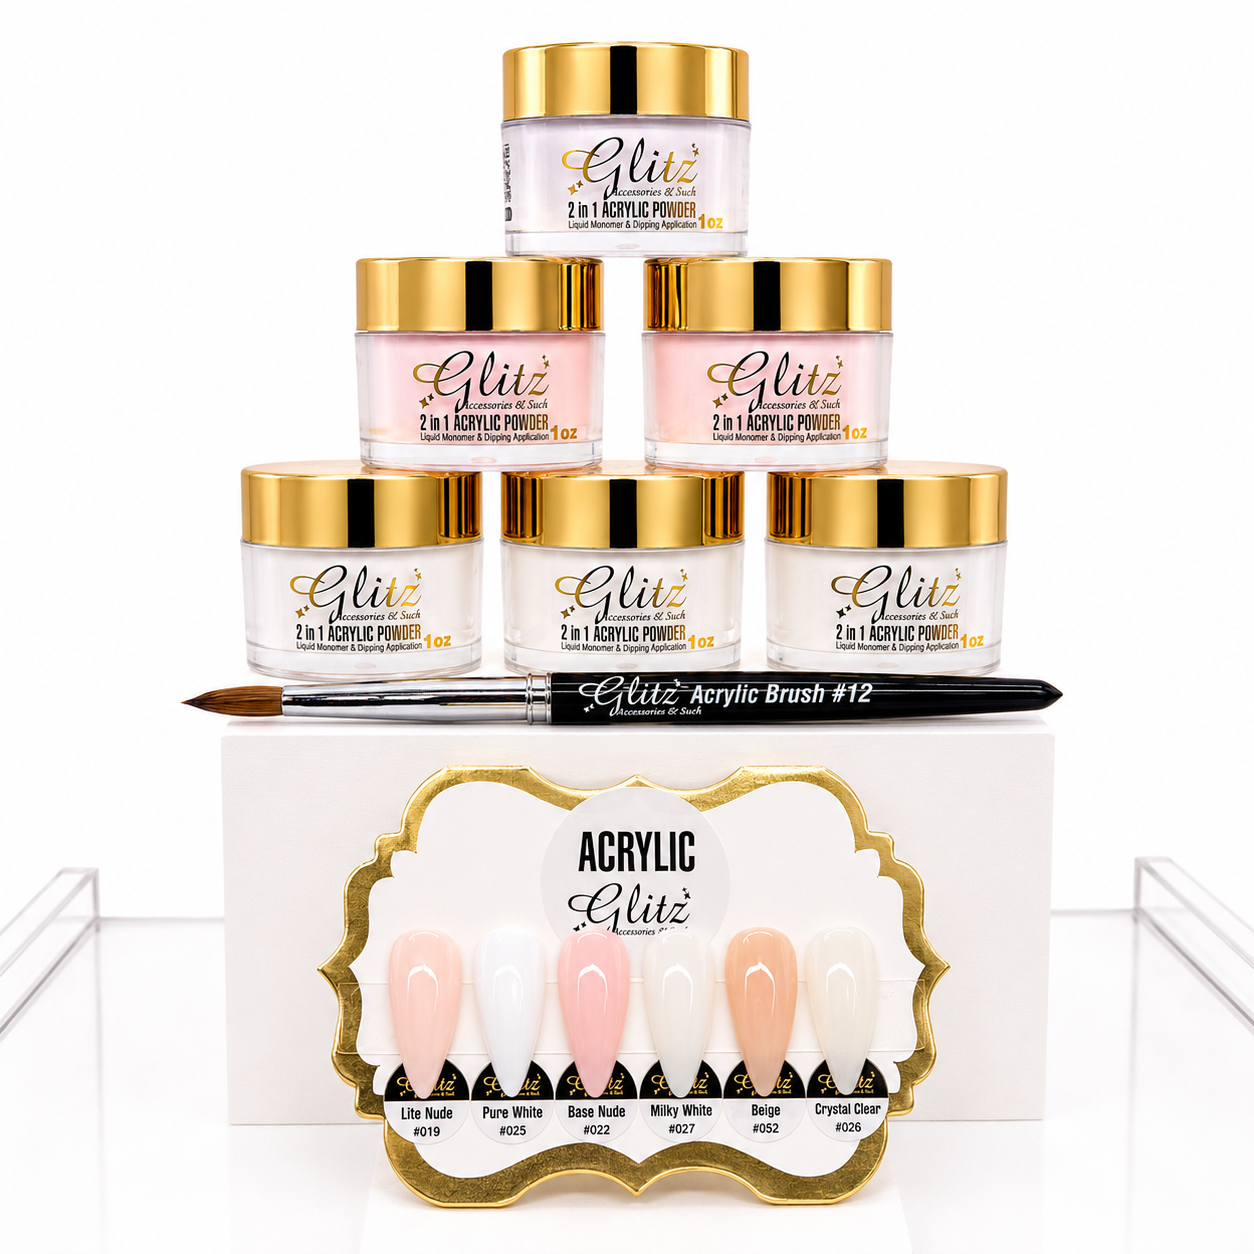 Image 4 of 7
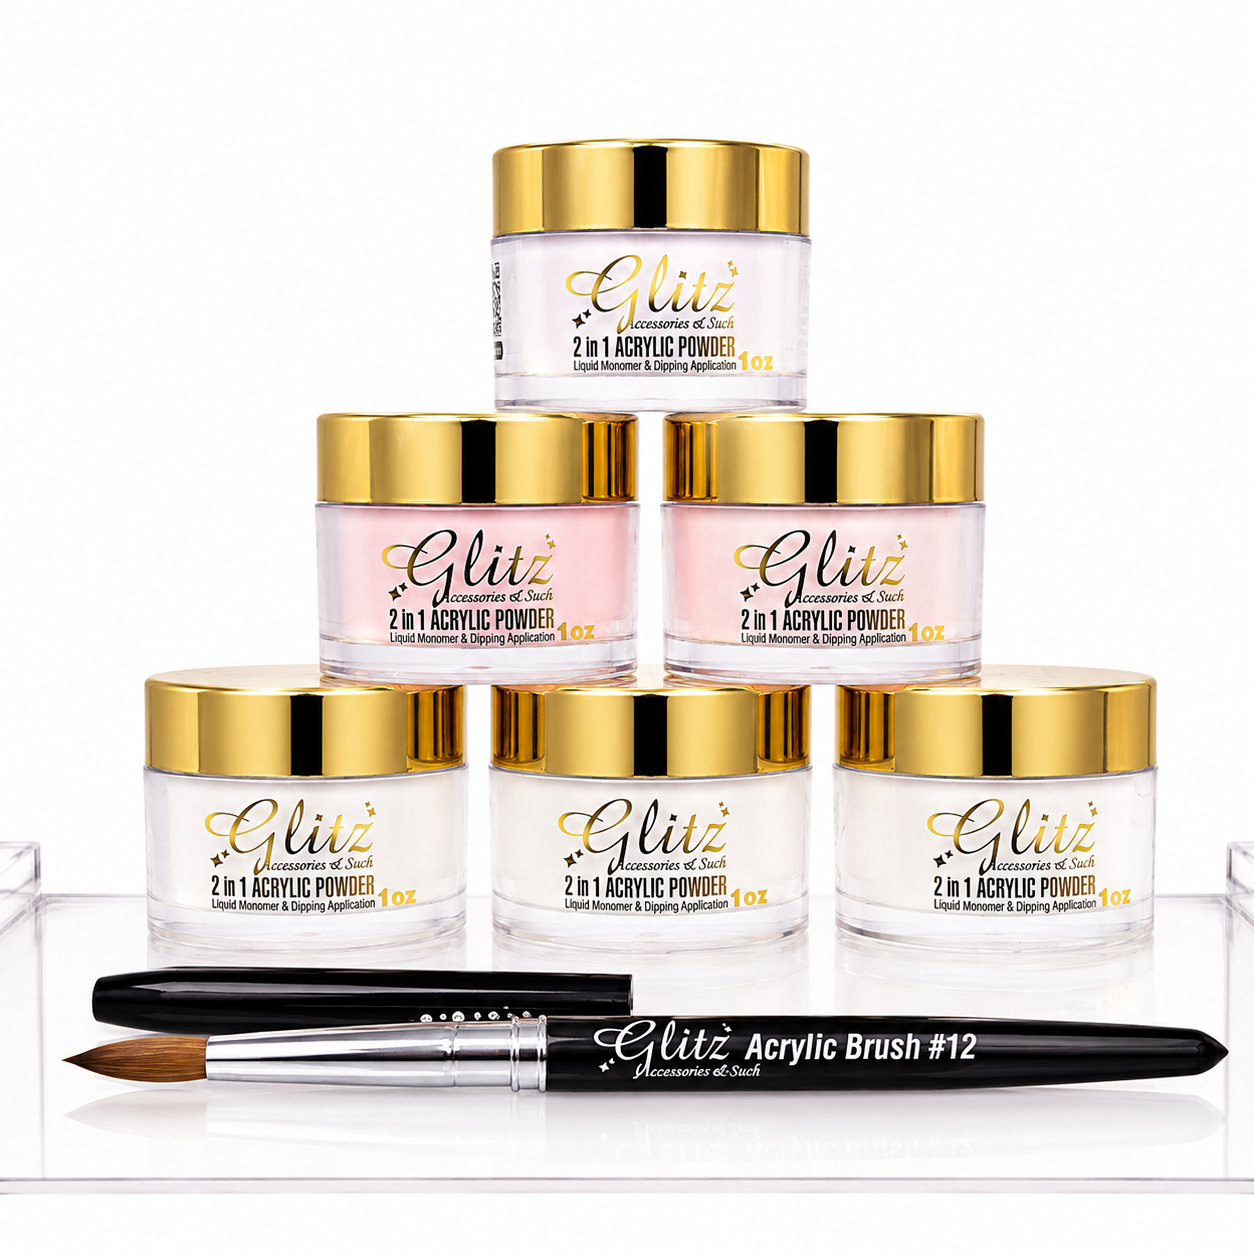 Image 5 of 7
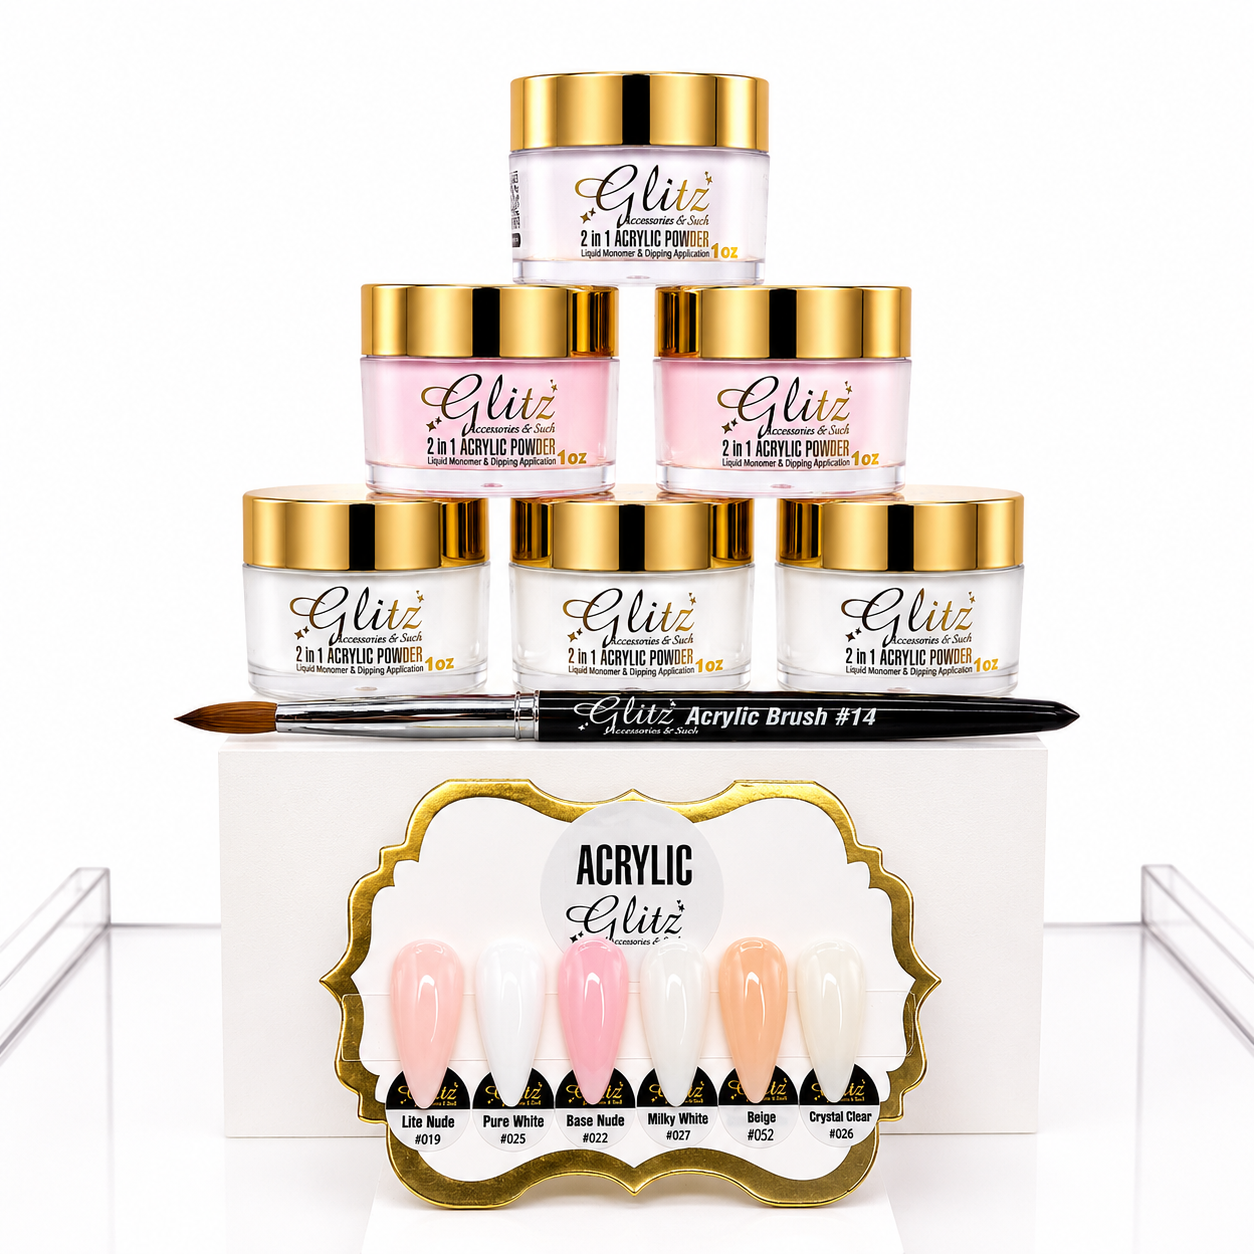 Image 6 of 7
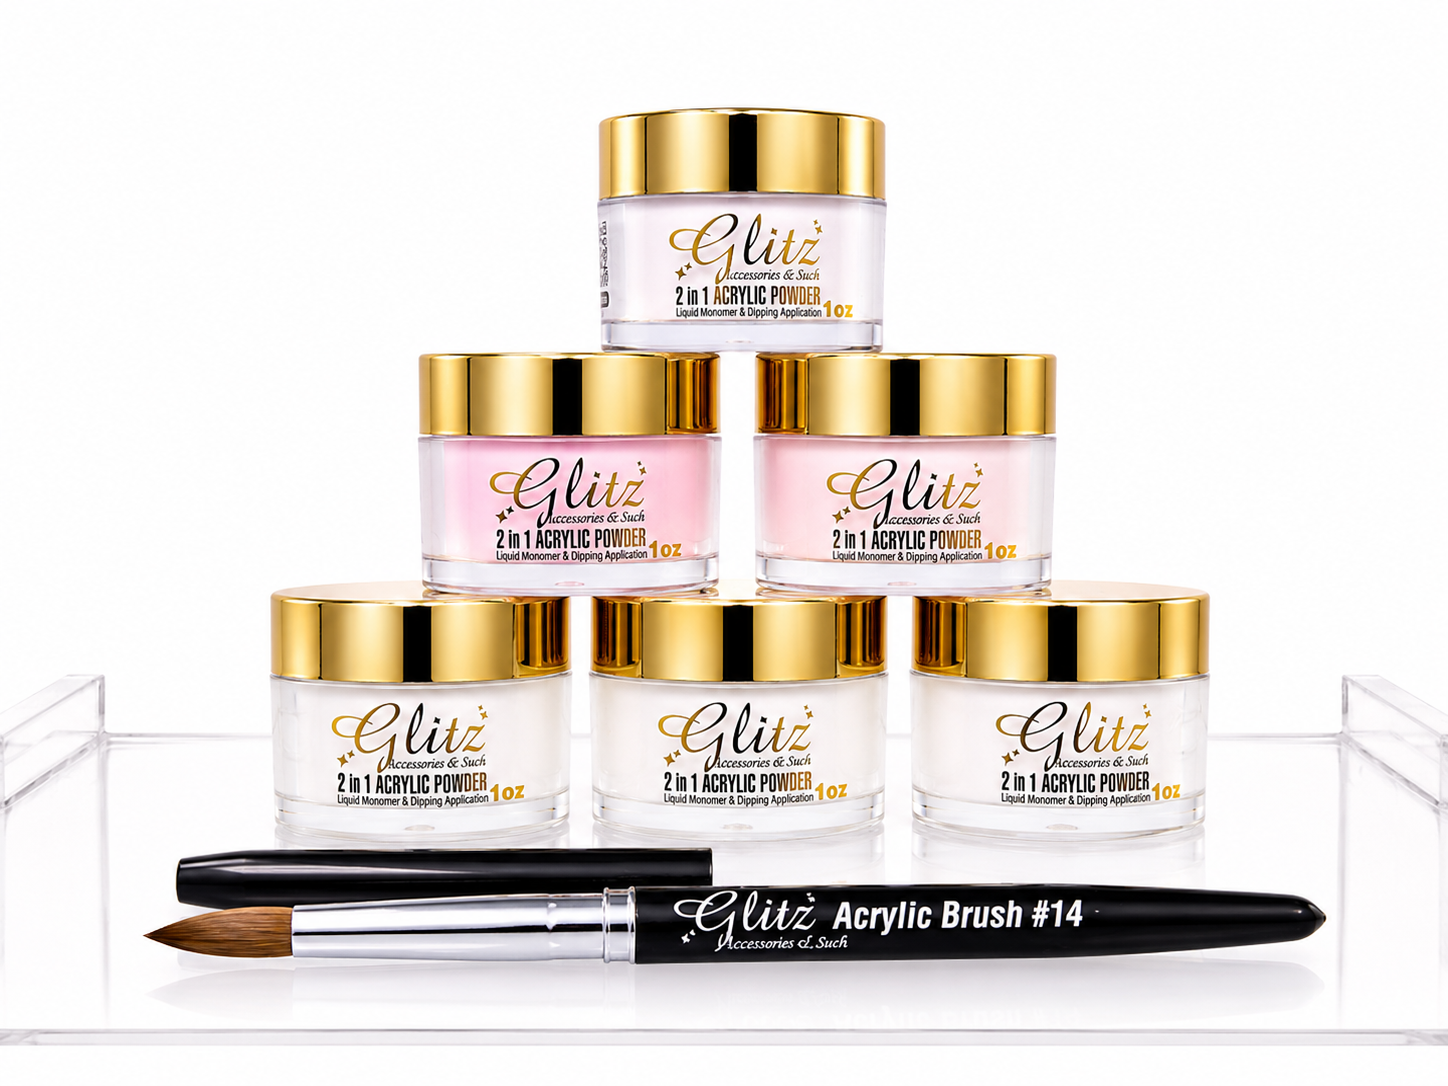 Image 7 of 7